Halloween Chocolate-Covered Oreo Eyeballs

These Halloween Chocolate-Covered Oreos feature white chocolate-covered Oreos that have been decorated to look like eyeballs. This is a super cute Halloween dessert that kids and adults both love!
If you’re looking for a quick and easy no-bake Halloween treat that kids and adults will love, these white chocolate-covered Oreo eyeballs are perfect. It’s scary how cute they are!
I’m usually not a fan of eyeball-themed desserts they can be a little too realistic, but this recipe keeps things fun and festive. I especially love that it’s no-bake and requires just a few ingredients.
This is also a great treat to make with kids, as they’ll have fun assembling the “eyeballs” using brown candies and Life Saver gummies!
Serve these up at your Halloween party for a spooky-cute addition to the dessert table!
Looking for more Halloween treats? You’ll love this Halloween charcuterie board and this recipe roundup of Halloween ideas!
Ingredients in Halloween Oreo Eyeballs
To make this cute Halloween Oreo treat, you’ll need the following basic ingredients:
- White melting wafers
- Oreo cookies
- Red candy melts
- Life Saver gummies
- Brown chocolate candies (such as M&M’s)
How to Make:
- Line a baking pan with parchment paper and set aside.
- Lightly dip an Oreo cookie into the melted white chocolate, coating all sides. Let excess chocolate drip off and then place onto prepared baking pan.
- Repeat with rest of cookies.
- Once all the cookies have been coated in white chocolate, place the pan into the freezer just until the chocolate has hardened.
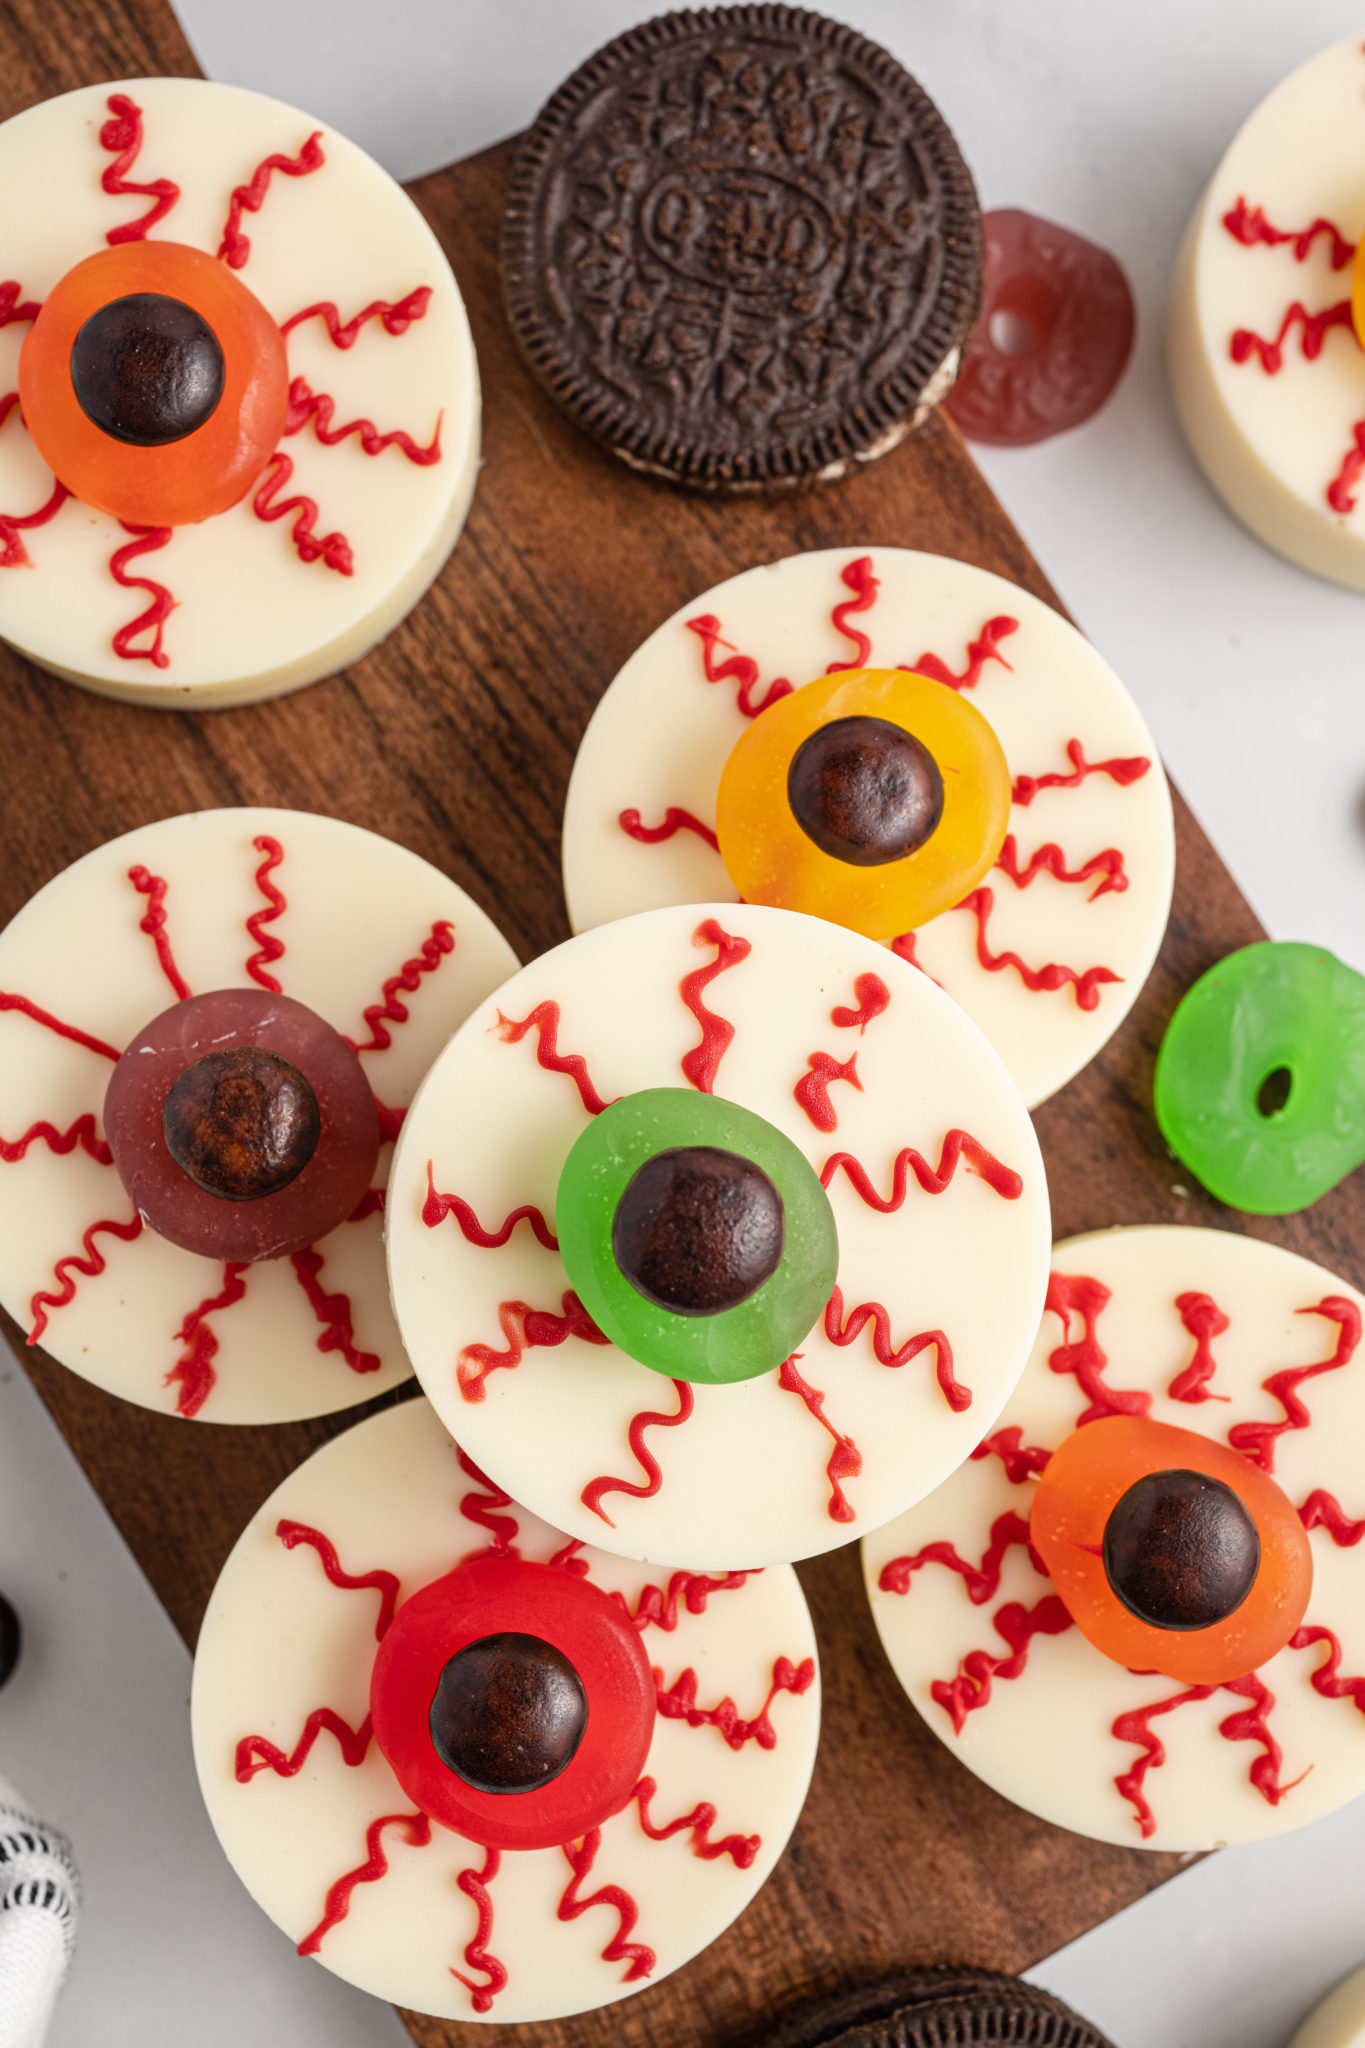
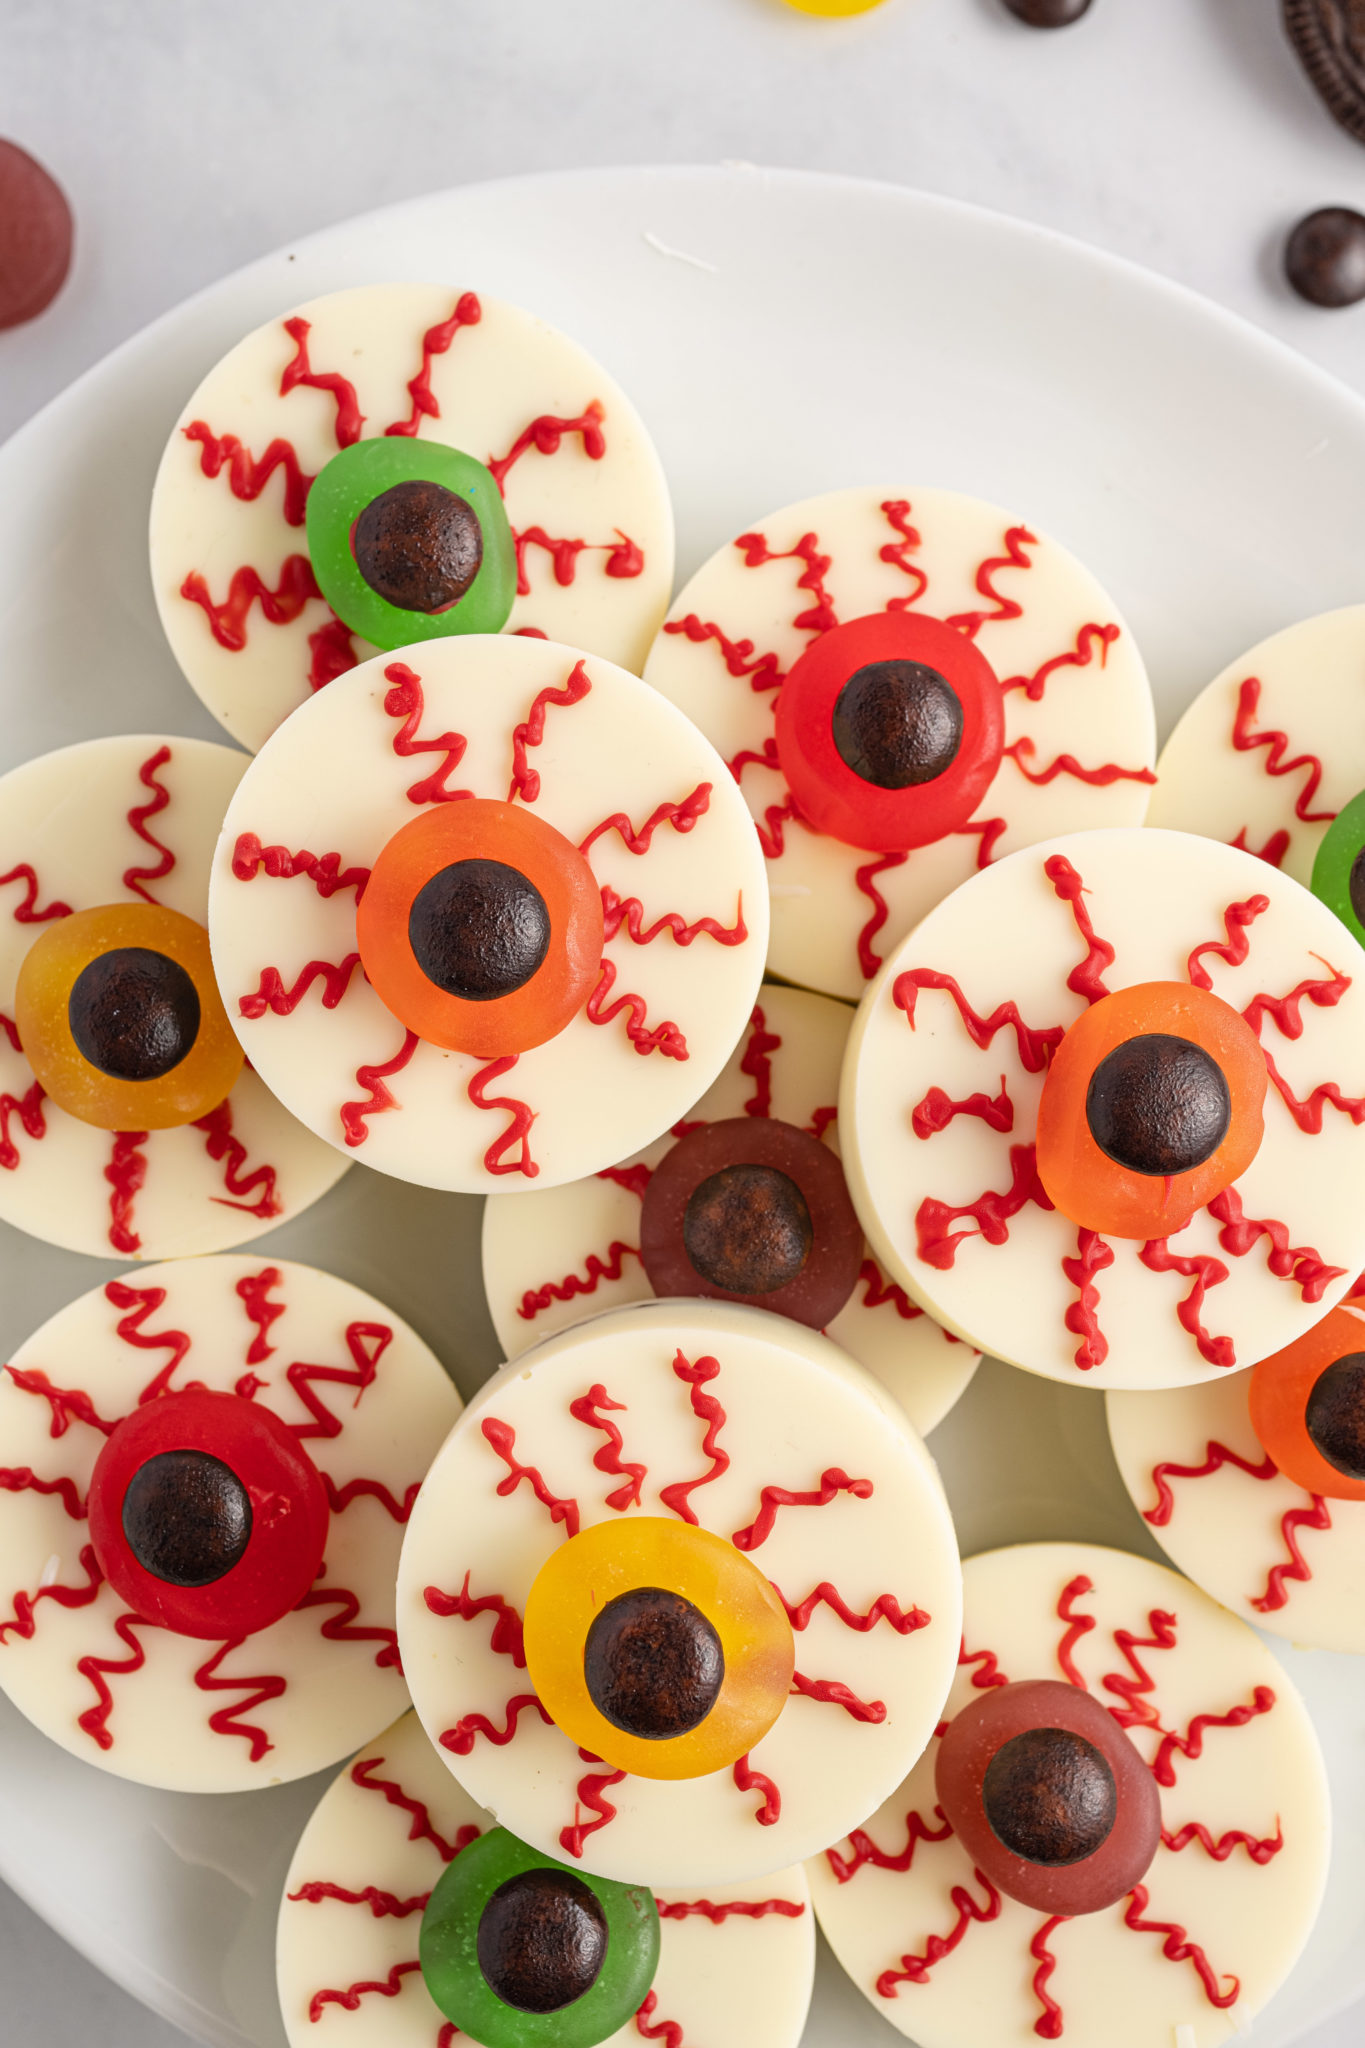
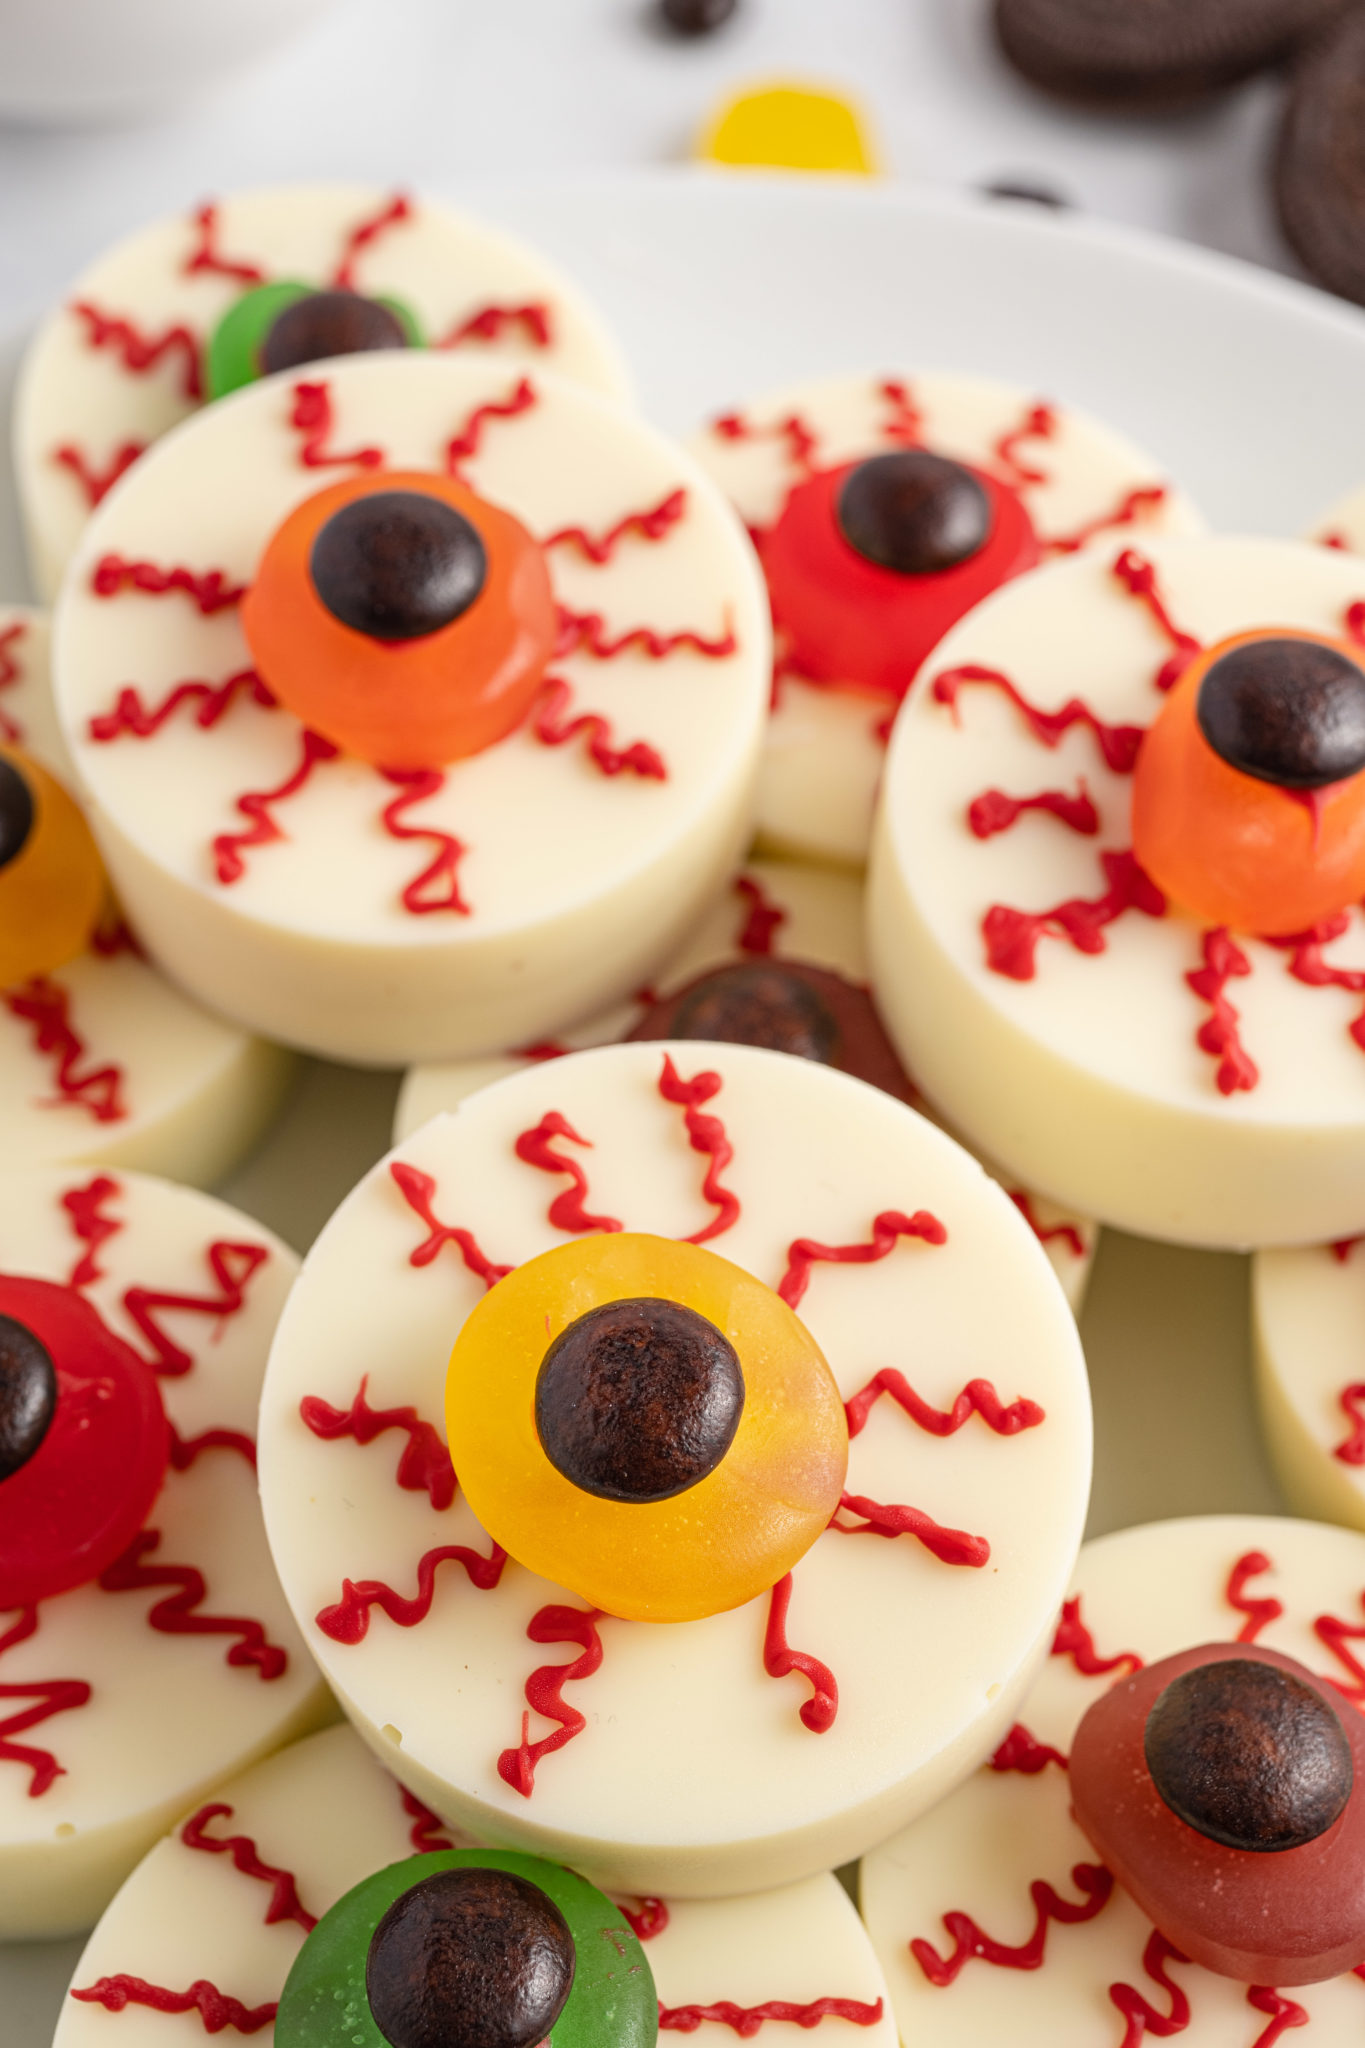
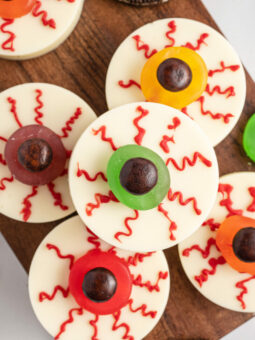
- Transfer the melted red candies to a piping bag (or ziplock bag), and cut a tiny hole in the tip. Pipe some squiggly lines on top of the cookies to make them look like bloodshot eyes.
- Then, place a Lifesaver gummy in the middle of each Oreo.
- Squeeze a dab of the melted candy melts into the center of the gummies, then press the chocolate candy on top.
- Allow the white chocolate-covered Oreos to set until the red lines have hardened.
Can I Use Any Flavor of Oreo?
Yes, you may use any kind of Oreo to make this no-bake Halloween treat. I used regular Oreos because those are my favorite, but Double Stuf, flavored Oreos, or the special limited edition Halloween Oreos will all work too!
Can I Use Another Type of Chocolate?
No, you need to use white chocolate for creating the eyeballs. Dark or milk chocolate won’t make the Oreos look like eyeballs, after all!

Tips and Tricks:
- To achieve the same super smooth edges shown in the photos above, use a silicone cookie mold rather than dunking the Oreos individually into the melted white chocolate.
- I prefer using white melting wafers rather than actual white chocolate for this recipe. White chocolate tends to seize up, and if you need to melt more white chocolate than anticipated you have to dirty a second bowl to do so. White melting wafers melt beautifully and don’t clump up like regular white chocolate does.
- If you don’t want to buy an entire bag of M&M’s just to use a few of the brown ones in this recipe, you may substitute chocolate chips to create the pupils.
Looking for More Easy Halloween Desserts? I’ve Got You Covered!
- Halloween Funfetti Cookies
- White Chocolate Halloween Bark
- Caramel Apple Nachos
- Pumpkin Patch Dirt Cups
Halloween Chocolate-Covered Oreo Eyeballs
Ingredients
- 2 (10 ounce) packages white melting wafers – vanilla flavored (I used the Ghirardelli brand) (melted)
- 12 regular Oreo cookies
- 1 cup red candy melts (melted and slightly cooled)
- 12 Life Saver Gummies (or round gummy candies)
- 12 brown chocolate candies (such as M&Ms)
Equipment
Method
- Line a medium baking pan with parchment paper and set aside.
- Lightly dip an Oreo cookie into the white melted chocolate, coating all sides. Let excess chocolate drip off and then place onto prepared baking pan. Repeat with rest of cookies. *(I like to use a spoon for this)* Place into the freezer for about 10 minutes, or until chocolate has hardened.**Alternatively, you can use this silicone cookie mold**
- Transfer the melted red candies to a piping bag (or ziplock bag), and cut a tiny hole in the tip. Pipe some squiggly lines on top of the cookies to make them look like bloodshot eyes. Then place a Lifesaver gummy in the middle of each Oreo.
- Squeeze a dab of the melted candy melts into the center of the gummies, and press the chocolate candy on top.
- Allow cookies to set until the red lines have hardened. Store in an airtight container in the refrigerator.
Notes
- Cookies will last in an airtight container in the refrigerator for up to 10 days.
- Store covered in plastic wrap and foil in the freezer for up to 3 months. Thaw before serving.
- See my tips and tricks for making these Oreo Eyeballs above the recipe box.

